

How To Make A Photo Look More Professional In Photoshop
Enjoy this Photoshop tutorial, which will make your photograph instantly await better. It'southward super easy and quick. and take advantage of layer blending modes in photoshop. This works the same in whatever version of Photoshop.
How to Make Any Photo Wait Improve in a Few Seconds – Easy Photoshop Tutorial
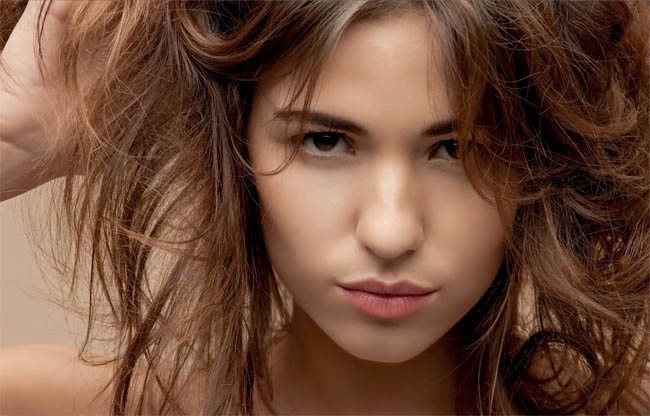
This is a technique I call the euro glow or the euro tent just considering I don't actually have a real name for it, merely information technology's something I've been doing for years. It works for people, it works for landscape, it works for all kinds of photos, and at that place'due south basically 3 steps.
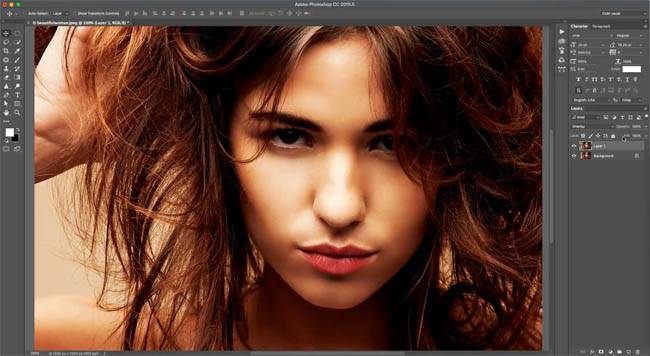
one.
Duplicate the groundwork past hitting Ctrl J, that would be Cmd J on Mac, or nosotros could merely click and drag it as that new layer icon.

2.
There's two dissimilar ways we tin approach this effect. I is with the Overlay Blend Mode. Modify the way from Normal to Overlay in the layers console.
Adjust the opacity, to dial in the strength of the effect. You can see it adds contrast. It darkens the shadows and it strengthens the saturations of the colors in some of the skin tones and things.
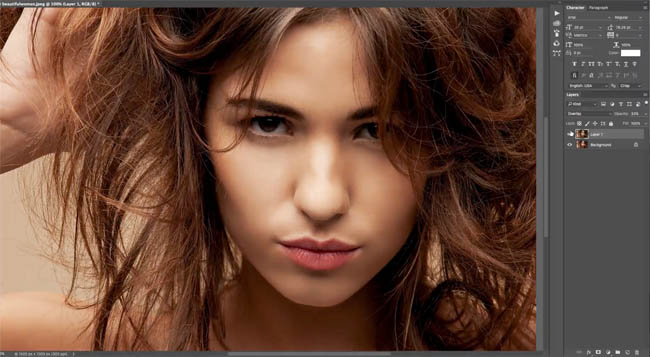
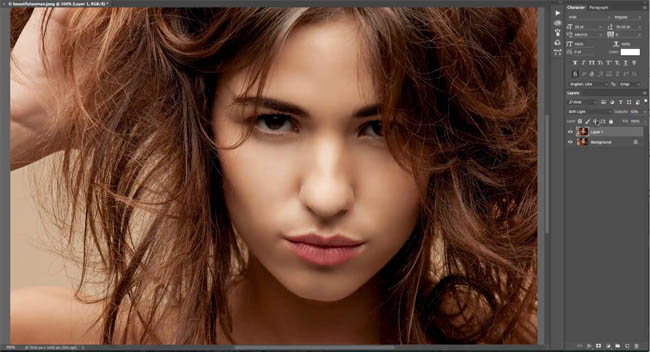
The other way of doing information technology is that we tin go into Soft Light. Soft Light gives you lot a similar effect but a little chip more subtle. This works well when overlay is as well much. Hard Light does exactly the same thing as Overlay, in this case.
3.
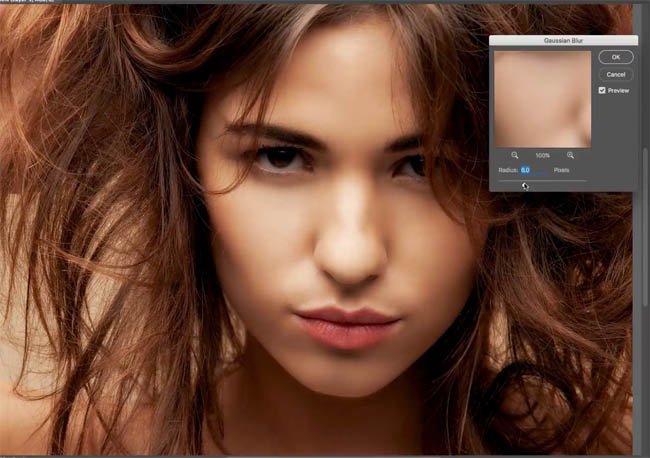
Okay, then that'south the first step. We've been able to exercise that. At present the side by side step we want to practice is nosotros desire to add a little bit of a blur to this. So if we go up to the Filter >Blu>Gaussian Blur, give information technology a footling bit of a mistiness. At present yous'll detect in that location's a sweet spot to the right corporeality of mistiness. If we exercise it very low, it doesn't really do much, and and so, if nosotros become also high, it doesn't do a lot either. Information technology only starts to look actually kind of weird. Find a sweet spot in here where at that place's some kind of a glow, and I'grand noticing it effectually at 6 pixels for this particular image. At present, this is going to change depending on the resolution you're working on.
Find the hair can look harbinger-like and stringy, and when I exercise this, it gives us cute, silky hair. And a lot of the time, I might apply this effect just to the hair, and mask it into the hair. In this example, it looks a little much in the peel because this particular image I got from Adobe Stock looks like is a little over retouched to start with. And then if you lot practise have a little bit of acne and some unlike things like that, the softening on the skin can really help.
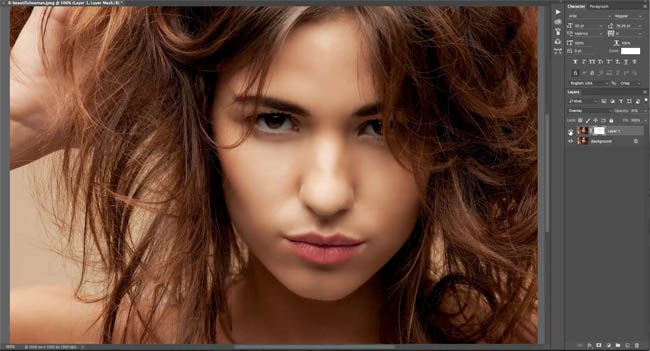
Now, we're looking pretty skillful, just what we want to exercise is nosotros want to paint back some of these areas here similar the eyes and the lip line.
iv.
Create a layer mask, then, we're just going to paint with black.
Grab the pigment brush, make sure black is the foreground color. Make certain the Hardness is turned all the style down, so it's a squeamish soft castor. Paint over the eyes. We're starting to get some of that color back in the eyes considering we didn't want it as dark all the way in, and we'll go far a little bit smaller, then, just kind of follow those lines into those tear ducts. And we're but bringing back a little sharpness where we need it.

5.
The next place yous want is the lips. We don't want to do all the lips though, because this is a neat technique to smoothen out dried chapped lips. And then what we're going to do is merely follow the lip line in the eye there, and give that a nice, petty chip of sharpness back at that place while keeping everything else dainty and soft.
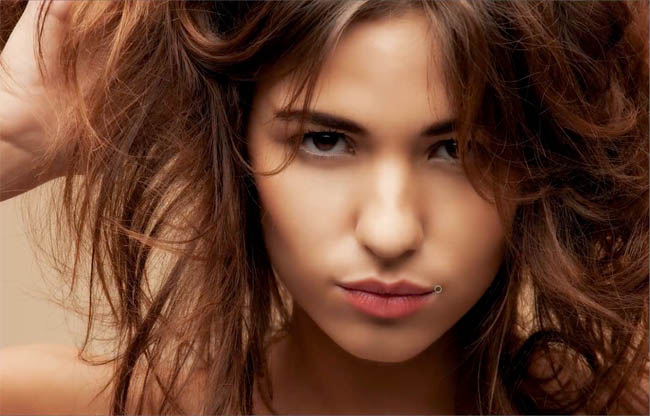
You can encounter we got a pretty awesome consequence at that place. Now you tin adjust the Opacity a little bit lower if you desire to brand information technology a little bit more natural.
Now this works on portraits. It works on landscapes. It works on whatsoever kind of photo. It'due south a technique I've been doing for years and a lot of the time, I will utilize this to certain parts of pretty much every photograph because it just makes a dramatic difference in just a few moves.
I had some requests about this technique with mural photographs. Here is a before/after with this same technique from i of my shots in Maui, Hawaii.

In that location might be other techniques y'all want to combine with it, and, also, y'all know, this is just the power of using Blending Modes. Check out the gratuitous e-book on Blending Modes. It's a lovely little e-book. It gives you a lot of information. Information technology gives you examples of all the different Blending Modes, as well equally some practical examples and how to use them.
So, anyhow, I hope yous enjoyed this week's episode. It's short and sweet. If you want to be role of the Cafe crew, join upwards past Subscribing at the pinnacle right of this page, and you'll go a new tutorial every unmarried week. At present if y'all enjoyed this, add a comment. Let's become a discussion going what do you like, what don't y'all similar, and what would you like to larn next. Allow me know.
Prissy to see you here at the Buffet
Colin
Layer Blending Modes. Gratis eBook by Colin Smith
Grab your free PDF ebook correct at present. We were going to sell this for $9.99, but figured we would requite information technology abroad instead and see what happens 🙂

Source: https://photoshopcafe.com/make-photo-look-better-seconds-photoshop/
Posted by: selfridgehatilight1943.blogspot.com
0 Response to "How To Make A Photo Look More Professional In Photoshop"
Post a Comment